Monday, September 27, 2010

Moving on to the next battle

Dear god, it's been nearly a full calendar month without any postings! Whatever is going on? Well, sadly the boring real world gets in the way now and then and weekends are fully-booked, which brings all opportunity for gaming to a crashing standstill. Shame, but there it is!

I have been toying with ideas however, primarily one about doing a historical re-fight. It dawned on me that my newly-completed armies could represent very good forces in a SYW-style refight. If I doubled the scale, a very big battle!

I checked online for some scenarios, and found a bunch of them available online for free via Sam Mustafa's excellent website for his rules 'Might & Reason' (championed here on my website on several past campaigns!) The link is:


After tabling the forces and relative sizes, I realised that the Battle of Hochkirch from 1758 was a plausible candidate for my dining room table, if I halved the unit size (i.e. represented each unit with a single base rather than the normal two.) I'm currently tinkering with scales and reduced areas, plus also trying to work out how to represent the landscape on the table (it appears that the battle map was basically a large sloping hill, with around seven different contoured heights given on the scenario map.) I was planning to make the terrain by putting some books under my grass-green throw-rug, but having 7 books mounded up at one end of the table and none at the other seems a touch ridiculous! Still, I'll contrive something roughly close enough to the historical map to let the refight go ahead - after all, with time so difficult to find, no little technical problem will cost me the chance for a tabletop scrap! So far, next weekend looks free, so I'm off to polish my breastplate and have my sabre sharpened up.
Thursday, August 19, 2010

The Battle of Berkhoek


I have cracked the use of Battlechronicler, so I can now supply explanatory maps and cut down on text - always far better to get the casual blog reader to follow a battle report, I find!

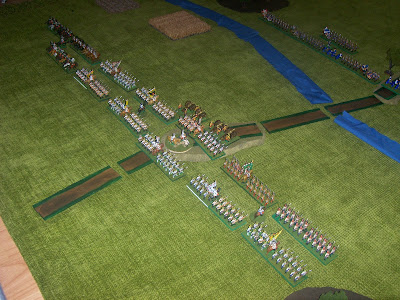
The situation starts with the Aschenbach army behind the small stream near the village of Berkhoek. Their right is on a wood, while their left is near a marsh. The cavalry is on the left, while there is a small field redoubt between the cavalry and infantry to protect the line further.

The battle opens with an artillery exchange, with some troops falling on each side.


The Aschenbach line, seen from the redoubt.


The full Luftberg army, deployed in classic linear style.

The advance got underway - Luftberg planned to pin the front and quickly deliver a flanking blow with the cavalry, which would roll up the enemy line. The Right-Wing cavalry advanced rapidly, splashing through the stream in front of the enemy horse and taking heavy fire from the redoubt.


The cavalry press on and attack the enemy dragoons, flanking them and forcing them back. Elsewhere the left-wing cavalry continue to languish and make slow progress, while the infantry lines trade long-range volleys. The grenadiers push heroically forward however, showing the aggressive spirit necessary!

The cavalry battle in progress.


Presumably inspired by the example, the Hungarians cross the stream too, after the Grenadiers - one battalion of which charges and captures the artillery guns next to the redoubt in heroic style, but sadly the redoubt's defenders make further advance impossible without exposing their flanks to deadly fire. Where are the cavalry - they're surely meant to protect against this sort of thing!

The infantry lines stutter forward towards each other, with battalions being repeatedly halted in disorder by the hot fire. Aschenbach is naturally doing better here, outshooting it's more poorly-drilled rivals.

Aschenbach's line is straining as the casualties mount, but the reserve Fusilier battalion from the depot in the rear finally arrives to help out. Likewise, a battalion of IR7 refuses the flank to keep the line together.


At last! The left-wing cavalry finally roll an excellent move and ford the stream, heading deep into the enemy rear. The right-wing cavalry are stalemated, and a second attempt by the grenadiers to charge some cannons is halted in a storm of grapeshot. The line is holding, but only just - and there's nothing left to stop this cavalry attack threatening to descend. Von Hartling decides to withdraw slowly, hopefully avoiding the enemy cavalry before it can get a successful orders roll. Disaster strikes however, when Von Hartling completely fails his own orders roll - his army is a sitting duck!


Nooo! The cavalry commander on the Luftberg left wing gets the second full-effect orders roll - two turns in a row now! This incredible streak of form sees his horsemen descend onto the backs of the hard-pressed bluecoats, who promptly shatter like glass.


The disaster is total - two battalions are scattered, while a third is surrounded along with the surviving gunners. Caught deep within the milling hordes of Luftberg troops, there's nothing for it but to send out a white flag and begin the genteel process of negotiating an honourable surrender. Von Hartling does however use the time for this wisely, snatching his remaining infantry clear of the wreckage, abandoning the redoubt and falling back behind his cavalry as a screen.


Gentlemen, another glorious victory to the Elector Von Luftberg - champagne!


Tuesday, August 17, 2010

Technical Problems

Apologies for the delay, everybody. The battle is fought, but I am intending to post photos & the report along with maps using the Battlechronicler software - worth googling as it's a free download for your wargame maps etc. to put on your blog. Only problem is that I'm still going through the 'teething troubles' stage, getting the hang of how to use it. The results should be along soon, hopefully, so please bear with me!

Friday, August 6, 2010

Up-and-coming Fight


Thanks to everyone who commented on the last post - my long-held objective is complete! And now, with perfect timing, the Muckenmire campaign has thrown up an interesting (and large) battle.

Winter approaches, so both sides are largely clearing up the province by engaging in the time-consuming and static pursuits of siegecraft. Von Krumper is now camped outside Veldhuizburg, Von Zaub is away investing the large and isolated city of Oosterheide, and Von Hartling - well, it's not going so well. After entering the province and sweeping a few towns away from the enemy, the dire autumn weather forced a halt and consolidation, building a depot to let him move deeper into enemy territory. Upon completion, he crossed the river Konigveldt and approached the garrisoned town of Vincken for a siege. Sadly for him, there was a late-freeze in November that restored full-speed movement in the province before the serious winter snows set in. With the roads passable, no less a force than the Elector Von Luftberg's army itself (newly arrived in the province and looking for trouble) began approaching fast.

Keeping up the siege was impossible, and hasty withdrawal to the Konigveldt river the only option. However, Von Hartling wasn't about to give up without a fight. The road back to the river is one of 20 miles, but two-thirds of the way back the road is hemmed in - by woods and the river to the north-west, and swampland to the south-east. At this bottleneck, the outnumbered Aschenbach army can make a stand and hopefully bloody the noses of the Elector's men.

Forces are as follows below. The Aschenbach army has every advantage of terrain and position, but is heavily outnumbered: parity in artillery, but facing odds of two-to-one in Infantry and three-to-one in Cavalry.

Aschenbach - Von Hartling commanding
IR4 Von Hoffman Infantry Regiment
IR7 Von Dunckel Infantry Regiment
FR8 Von Grappel Fusilier Regiment (one battalion late-deploying)
DR1 Von Fleiger Dragoon Regiment
#2 Artillery battery
Rudimentary fieldworks

Luftberg - Von Luftberg commanding
Pilsen Grenadier Regiment
IR2 Doppler Infantry Regiment
IR5 Von Trapp Infantry Regiment
IR7 Von Stiegl Infantry Regiment
IR9 Bartok Hungarian Infantry Regiment
KR3 Klimt Kurassier Regiment
DR2 Krauss Dragoon Regiment
HR2 Schiele Hussar Regiment
#1 Artillery Battery
Siege Train (not on field)
Pontoons (not on field)

Monday, August 2, 2010

Painting: Completed!


It's done! In a post I sometimes never thought I'd type, here it is: I have completed my Seven Years' War armies! First conceived in 2008, and now - roughly one and two-thirds of a year later, they are now completely painted and based. I had thoroughly sickened myself of painting after an earlier burst that broke the back of them, and allowed me to play games with a few left over - I just couldn't face mopping up the remainder. Little bits were done here and there, slowly nibbling away at the pile, but that was all.

Then, yesterday morning, I suddenly had the impulse out of nowhere to just get my head down and finish it off. One lazy Sunday transformed into a frenzied paint-a-thon later, and it is over. The final Aschenbach units are complete, painted and based!

Doubtless when they make the film of this deranged painting project (it's all in my mind's eye, so why not?) I'll be on-screen looking all windswept and conflicted, trying to decide whether to go back for one last mission(painting session) before final retirement. I'll be living in some log cabin in the mountains, where I've no doubt sought refuge from the horrors of the war(gaming.) I'll tell my boss(conscience) that I'm through with it - I'm out, and have no more interest in coming back. He'll tell me that if I don't do it, nobody else will - and, just before he walks off to leave in his jet-powered helicopter (yes, he has one of those) he tosses a single, battered figure at my feet. I look down, and pick it up: a Prussian Musketeer, Advancing (Catalogue Number SYWP1 , Essex Miniatures.) Slowly clenching it in my fist, perhaps delivering a skyward shout to the uncaring gods, I know that once more I'm back in the game, damn them. Just when I thought I was out, they pull me back in... They pull me back in...

In retrospect, I probably need to go have a bit of a lie down! Ponder all the games to come, and all that! :-) Here's some eye-candy of the second army.


Cavalry above - Cuirassiers & Dragoons

Generals & Grenadiers


Fine regiments of Infantry, Grenadier mitre-caps shining in the foreground


Infantry in foreground, plus Fusiliers and Hussars behind

The Artillery


Meet Otto - the flag-bearer in IR7 (Von Dunckel) who enters my personal painting valhalla, as the very final figure based out of the approximately 719 painted and based to complete this project.

(Also, Thanks to all who ever read the blog or posted on it over the long struggles with kind words of encouragement - it made a big difference!)

Thursday, July 29, 2010

July activity

Where does the month go? I've been busy with much 'real life' stuff, plus when I have been able to progress with the Muckenmire Campaign, it doesn't immediately generate any action - curses on this muddy weather, slashing everybody's movement! Still, even with this delay I believe a big battle could be soon approaching, as Elector Von Luftberg himself has arrived with his army of reinforcements.

More generally in the hobby, I have been listening to the excellent 'Meeples & Miniatures' podcasts, which I would recommend to anybody with iTunes and (like me) has a long-ish commute each day to and from work. They basically just ramble on over any topic that takes their fancy on wargaming, and the result tends to be very entertaining. A recent discussion was on the board game 'Commands & Colours: Ancients' which I haven't played in ages. There was discussion of period variants, plus the way that numerous gamers had converted the game from a card board and wooden counters into effectively a quick-play wargame with miniatures. My interest has been tweaked - I may have a root around for a SYW-version I can use my miniatures with. The ability to fight a decent wargame-like battle on a limited-size board and complete it in 60-90 minutes would be a nice 'filler' game, so we shall see!

Monday, July 19, 2010

Highway Robbery!

Taking up the action just south of Veldhuizburg, I laid out a large map area for just two cavalry units a side to fight out a large-scale skirmish on - the Luftberg cavalry of one Dragoon and one Hussar regiment making their escape south down a road, while the Aschenbach cavalry of one Cuirassier and one Hussar regiment dash to stop them.


The Luftberg cavalry crosses the Schelve and heads south down the road (bases turned sideways as they're in column.)


Oncoming Aschenbach cavalry races in from the east (partially obscured by the mist. Some would say the camera didn't focus, but what would they know?)


The Aschenbach cavalry moves fast, and manages to cut the road in front of the Luftberg column, just next to a small cornfield.


Luftberg hurriedly deploys, and the Dragoon regiment steps sideways onto a little rise of ground nearby.


The Hussars and Cuirassiers clash, with the heavier troopers winning and the Hussars falling back.


The opportunistic Dragoons charge down onto the flank of the tired Curiassiers and send them reeling back in disorder through the crops. A stand-off ensues, with each side rallying as best as they're able. Luftberg eventually moves it's Hussars off southwards, behind the Dragoons.


This leads the mobile Aschenbach Cuirassiers to swing round the revealed flank and hit the Dragoons again - it breaks them, sending the broken remains fleeing south.


And with that, the fight is over! Luftberg's cavalry slip the noose and escape being penned up in the siege, but in doing so their Dragoon regiment has been routed by the enemy. Plaudits all round! I'd recommend trying this as a quick skirmish battle - I actually used a playing area large enough for both my entire armies, so moves had to be carefully thought through to prevent the four units I actually used just slipping past each other. The Black Powder rules also worked very nicely, with lots of flanking and reforming: just what you'd expect from a cavalry battle.