Sunday, November 30, 2008

New Regiment

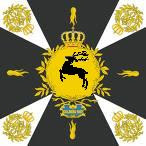
I just wanted to make a quick post, partially to update you all, and partially because one last post in November will make it my busiest month yet (a personal best!) Anyway, here's the latest regiment off the painting table, sporting blue facings which, according to the chart I made planning all my regiments, means it will represent IR1 Radetzky. Thanks also, as many will have probably guessed, to 'Not By Appointment' for the templates.

Thursday, November 27, 2008

Public Service

I've seen this on some other websites, so thought I'd do the same to help out. The Essex Miniatures website is typically very good, supplying photos of several figures etc. However, the 15mm SYW area has lots of photos of Prussian units, but only a paltry couple of pics for Austrian units to tell you what you're buying! As such, for those with an interest, below are pics of what I've ordered. If anyone else is thinking of buying, perhaps this'll give you a bit more info on what you're deciding on potentially purchasing.


SYA10 - Chasseur/Jager Skirmishing. A single pose per pack, giving you 8 figures standing and giving the 'business end' of a musket to the enemy.

SYA9 - Mounted Infantry Officers. I believe the three figs in a pack are all the same; a trotting horse, plus a hand-on-hip officer casting a slightly sideways glance (no doubt checking alignment.)

SYA7 - Hungarian Grenadier - 8 identical figures, at the ready and looking set to advance. Bearskins too, as you can see.


SYA6 - Hungarian Infantry Command Pack. Each pack contains two of each of the figure types above. As befits 'lively' troops, they have a certain swagger lacking in the line infantry; the officer waves a spontoon ahead, the colours are swirling a little more, and the drummer (presumably) is depicted mid-solo.


SYA5 - Hungarian Fusilier. Through his pose, he appears surprisingly close to the Prussian infantry figure, so it's all in the painting to see the distinctive uniform details. Small paintbrushes not optional.


SYA2 - Austrian Command. Six figures a pack, two of each type. More restrained than the Hungarians, but I do like the officer gesturing ahead.


SYA1 - German Fusilier. The Johnny-Average of the army, the standard line infantryman at the ready.


Wednesday, November 26, 2008

Regimental Overhaul

I’ve been pondering the Luftberg state’s army, and for some period of time now I’ve been pondering a bit of a ‘military reform.’ Nothing like altering any of the illustrious regiments already round the colours, you understand – more like a basing change. Basically, I feel my units are a bit ‘light’ on metal. I initially started out on a basic infantry unit of 16 figures, which was pretty respectable-looking. However, even this didn’t last for long as I had to revise and expand to use the Might & Reason rules. Each unit now stands at eight lonely figures – resembling more of a skirmish line than the bristling juggernaut of death-dealing mayhem I know each regiment to be (I’m sure every wargamer pictures their own units the same way.)

It’s overdue in a way – despite this being one of my favourite and most long-standing hobbies, I’ve still somehow avoided spending a lot of money on it for a long time. As a result, it’s time to buy some more figures and replan the establishment of the units. I decided to place an order with Essex Miniatures, which arrived the other week.

So, what sort of change? I’ve done much pondering over other blogs, looking at photos everywhere, and have an idea. The M&R rulebook has photos of some wonderfully based units in 15mm, which I’ll be imitating. Each infantry base is two ranks of six, close-packed for a satisfying density, making each regiment weigh in at 24 figures. Or more accurately, 23 figures, thanks to the regimental commander being mounted and taking up somebody’s space with his horses’ backside.

Each regiment consists of: 1 mounted officer (taking up one file), three command units (an officer, a drummer and a colour-bearer) and 19 other ranks. For spacing etc, this goes on a 60x30mm base of MDF.

I’ve painted one regiment, just to try out spacings etc. and see how it looks. Here’s a snap of the first one. Meet IR Steinkopf (No. 11), outfitted in a natty white coat, breeches & waistcoat, red facings, black gaiters and white lining on the tricorne.

Monday, November 24, 2008

Highway Robbery!


Thanks to all the mop-moving and card-playing, we've got a pretty decent narrative for a skirmish game that we might otherwise never have had. I was going to work out some clever system for raiders moving around, scouts, ambushes, etc. but then decided 'what the hell... I'll just pile a bunch of figures onto a table and see what happens!' It's worked not badly. Below is my not-quite-scientific doodle-sheet which let me come up with ideas. I recommend this, actually, to aid thinking. The only problem is that it's usually impenetrable to anybody save the writer!
From sketching road networks running north to the city, as well as west to the Aschenbach army over the river, things have coalesced around a pair of road junctions. There's the direct route north, which the Luftberg army will want to pass up. This has been covered by a small fieldwork watched by Freicorps troops, no doubt taking a break from some pillaging, plus some cannons in support. Off on each flank was a few hussar detatchments, while slightly to the north was the undetected regiment of IR7 von Dunkel's infantry, ranging a bit far from home and looking for trouble. Due to the small scale of the fight, I upped the scale so each base represented a company, so according to the Kronoskaf website six companies makes up a typical battalion. It's pictured below, with no other figure than von Zaub chatting to von Dunkel.
To attack this, the Luftberg flying column had no guns (too heavy) but a good plethora of light troops to give weight to the core of the force, the IR7 von Stiegl infantry regiment. Having successfully detected the initial Aschenbach positions, a plan was quickly devised. The notion was for a force of Croats to screen the dug-in Freicorps directly to the front, feint with a Hussar raid to the east, then land the killer blow on the west, where von Stiegl's troops could cut the road back to the river and force a rather hurried retreat from the Aschenbach troops who didn't fancy getting cut off from their main army.
Things didn't get off to a great start however, when the main column under General La Spezia's watchful gaze launched it's attack ahead of the lacklustre Hussars on the other flank, who clearly felt that launching a diversionary raid came a poor second to a lie-in. The Aschenbach hussar screen was swiftly brushed aside by the Luftberg HR2 regiment under Schiele. However, poor La Spezia got a bit too carried away and caught an unlucky sabre blow in the skirmish, getting himself carried off to have his wound treated.


Alerted by the din, the reserve of von Dunkel quickly rushed to the sound of the fighting. There was a small hillock behind the junction, and each side rapidly realised that ownership would be crucial. Von Stiegl reached it first however, as the numbers of swarming Hussars cleared the hill and held the enemy back long enough for him to march up.

As the light troops on the east and centre of the road skirmished away, the two regiments formed up and von Zaub urged the bluecoats straight on. With a crash and din of musketry, the two sides blazed away at close range while the light cavalry continued to skirmish on their flank.

The lines wavered as troops fell back from the pounding match, but the generals kept on rallying them back into forming up and returning to the fight.
However, von Stiegl remained master of the heights for the time being, thwarting Aschenbach efofrts to break through long enough for the hussars to rout their rivals and menace the regimental flank. Von Zaub was alert to the danger though, turning a company out to refuse a flank and steady the situation.

However, things were clearly not going his way, and a fighting retreat was in order. The guns were able to escape cleanly up the main road due to the Luftberg hussars' late appearance, and the Freikorps troops held out comfortably in their fieldworks. However, the Croats' draining fire simply wouldn't stop, so before long the Freikorps were well and truly suppressed and just kept their heads down, trying to hold on long enough for the guns to escape. Once this was done, they joined in the general backwards movement and abandoned their works to the swarms of jubilant Croats who rapidly pursued.

Matters rapidly worsened as the hussars on the east flank finally appeared, descending on the Freikorps as they withdrew north. They took heavy losses, but ultimately managed to fend off the horsemen and kept falling back north. Von Dunkel was likewise pulling back, steadily giving ground and fighting all the way, leaving a trail of dead and injured in his wake as he held the whitecoats at arm's length.
The withdrawal was finally complete, with no troops or guns encircled or captured. This was something of a lucky achievement, and von Zaub's excellent performance was applauded by all! Meanwhile Luftberg's army was able to advance undelayed, with the road cleared to the city. Also, with the direct route back to the river cut, von Zaub now faces a protracted roundabout march to try and rejoin his superiors! Yes, the scene below at the crossroads says it all. The main column of the army approaching, Croats occupying the old fieldworks which would have caused such havoc, and swarms of light cavalry fanning out to harry the defeated foe ahead of them!

Thursday, November 20, 2008

The skirmishing captains

Von Hentsch determines on reaching the river at Spitzburg first, forestalling the Aschenbach advance. This means a FORCED MARCH to the province and a sharp SKIRMISH with any bluecoats that have ventured out to try and thwart him. At least, from sitting idle as he organises, his troops are well rested to avoid being FATIGUED. Enemy raiders and scouting groups will be spotted and cleared aside by SMALL FORMATIONS of troops going ahead of his advance. To get some kind of unanticipated edge, the crafty von Hentsch will arrange for these groups to live off the land and travel unusually light, abandoning their baggage and giving them a superior mobility (WILD CARD.)

It’s pretty likely he’ll be able to do the march without any problems, given how well prepared he’ll be following the last delay. Thus, success should come on a 3+ roll – slightly better chances than he had last time he tried. The roll is… A 5! Success, as he moves to Spitzburg and the outlying groups begin to clash.

So, we’ve the making of various minor encounter battles on the roads around Spitzburg, as Aschenbach raiders sent out the previous turn find themselves being hit by flying columns of Luftberg troops trying to clear the roads for the main army’s advance. Sounds like a classic bit of ‘klein krieg’ warfare. To the tabletop!
Wednesday, November 19, 2008

Spitzplatz approached

Aschenbach have a score to settle, and mean to do it! Since his opponent has proved so sluggish, the pressure’s off to an extent and von Krumper can move at his ease. Most sensibly, south out of the hills into the Oberwasser region, threatening to take up a good river-line position. Also, it takes him close to the route that Luftberg tried to scout out for themselves to advance on Spitzburg.

So, that’s a NORMAL MARCH to Oberwasser, where he’ll HALT and rest his army. He’ll take the whole force in a single, easy-to-maneuver LARGE FORMATION to speed marching, the swift advance will cause a MORALE DROP in the enemy leader, and he’ll also be able to tangle with the nearby detatchment that Luftberg sent out to clear their route, by launching a small hit-and-run raid (WILD CARD).

As it’s an easy march far from the enemy, we’ll say a 3+ for success. If he rolls a 5 or 6, the march is successful and also his hit-and-run raid on the Luftberg outpost will take place.

The result is… 4! Aschenbach safely march to Oberwasser, but sadly the raiding parties passing through the Vallensee and Spitzburg regions fail to make contact. Most likely, Luftberg’s feelers only made it as far as Vallensee while Aschenbach’s group simply darted over to Spitzburg and cut the roads. Felix von Hentsch won’t like this at all – a large enemy force within an easy march of Spitzburg, plus the roads already blocked for his own force! His own upcoming hand:

Normal March
Normal March
Normal March
Wild Card
Fatigued
Skirmish
Forced March
Halt
Halt
Small Formation

Monday, November 17, 2008

Spitzplatz campaign begins

For Felix von Hentsch, plundering Blinzburg is probably a bit premature – it’s likely to be well in his rear throughout the coming campaign so it’s already in the bag, so to speak. Far more tempting is Spitzburg – almost central in the province, and puts him in line for a river defence if the Aschenbach forces come directly for him. The catch – it’s pretty distant. So, von Hentsch plays the following cards:

ACTION – Forced March to Spitzburg
RESULT – Halt in the city
REASONS – The men will be eager for action as they have only just gained new recruits at the start of the campaign (Recruit/Desert card); They will have a Morale Increase from beating the enemy in the last campaign, plus von Hentsch will send a Small Formation of light troops ahead to clear the way and scout the route.

All in all, the results seem likely to favour such a proposal – a fast & speedy march by fresh and enthusiastic troops in the early days of high enthusiasm. As such, I’ll let it succeed on a 4+ dice roll. If it rolls a 3, I’ll allow the army to relocate to the Vallensee area, representing a partially completed march.

One roll of the dice, and it’s… 2! Failure, as no doubt Felix von Hentsch has found time trickling away while he organises his new army, forcing him to delay departure. Some hapless junior-ranking officers will be cashiered for such a delay!

So, with Luftberg firmly dropping the ball, it’s over to the Aschenbach army under von Krumper to make a move. He gets:

Halt
Siege
Normal March
Fear
Large Formation
Skirmish
Morale Increase/Drop
Large Formation
Rout
Wild Card

Feel free to chip in with ideas!