

Hello, all! As you may have gathered from the long silence here and the activity over on my other blog I have had to admit that there's only so much time in my hobbying for blogging, and running one is really the maximum possible. As such, my continuing 18C imaginations will still be continuing, but I'll simply do them over on my main wargaming blog and tag them all. There's even a big-scale outing for the Prussians and Austrians posted up at the moment, for you to enjoy!
Will hope to see you there!
Friday, May 4, 2012

Monday, October 3, 2011
Battle of Weissenburg

The major Strathian offensive of the war, as the Duke invades Meldenia. Above, we see Strathia entering from the right, while Meldenia approaches from the left - both armies are following the course of the river towards a plateau of raised ground.

The Meldanian Army, led by the Duke Cristoph Von Melden, in a succession of lines thanks to the cramping effect of the river.

The Strathian Army, mostly entering on the same bank...

... and across the river, a small mixed-arms detachment. Its aim is to place cannon over the river on the Meldenian flank, enfilading the line.

The approach - the Meldenians gain the hill, and the Strathians advance. Cannon-shots are exchanged along the main battle-line. The village and the bridge over the river fall to the Strathians, and the cross-river detachment swiftly clears some fields of lurking Meldenian Croats.

The Strathian Duke then sends his guards and grenadiers to his right flank, seeking a double-flanking move. The Meldenian line, luckily heavily stocked with infantry, responds by pulling in both flanks. Will the promised contingent from Meldania's ally, Buvalia, get here in time?

They do! Rushing up at speed from the Meldenian Rear, the Buvalian force moves down the river and detects a previously unnoticed crossing-ford. Suddenly the Strathian flanking cannon are looking vulnerable.

The carefully-tended fields, recently swept of Croats, turn into a close-fought battlefield as Strathian infantry battle to contain Buvalian horse and foot at the crossing.

Back at the main battle-line, the Strathian line is becoming stretched as the Meldenian artillery punches holes through the blue line. Reserves have blocked the flanking attack, so the Duke of Strathia throws in his last reserve in: four brigades of cavalry, launched like a fist into the centre of the Meldenian line to smash it wide open.

Meldenia holds out! The white line holds firm, and the oncoming horsemen are shot down by the score as they advance up the slope, raked by musket volleys and canister from the supporting cannons. The overstretched Strathian army can take no more and begins to fall back, leaving behind some of the flower of its troops dead on the ground

"Your Grace, you must flee this accursed field!"
Friday, August 19, 2011
Battle near Palmsa

The war is on! Strathia is up against an alliance of three enemy states, and the Duke Von Halburg himself is poised to invade Meldenia with the main army of the Duchy. To the south however, the secondary army is waiting under Count Von Stresswitz, guarding the main city of Palmsa from the Sarvanian Army (the two lower army markers you can see facing off against each other on the map above.) Sarvania duly advances, unable to resist the chance to put all of Strathia's plans into chaos by forcing a siege on their capital so rapidly in the war.
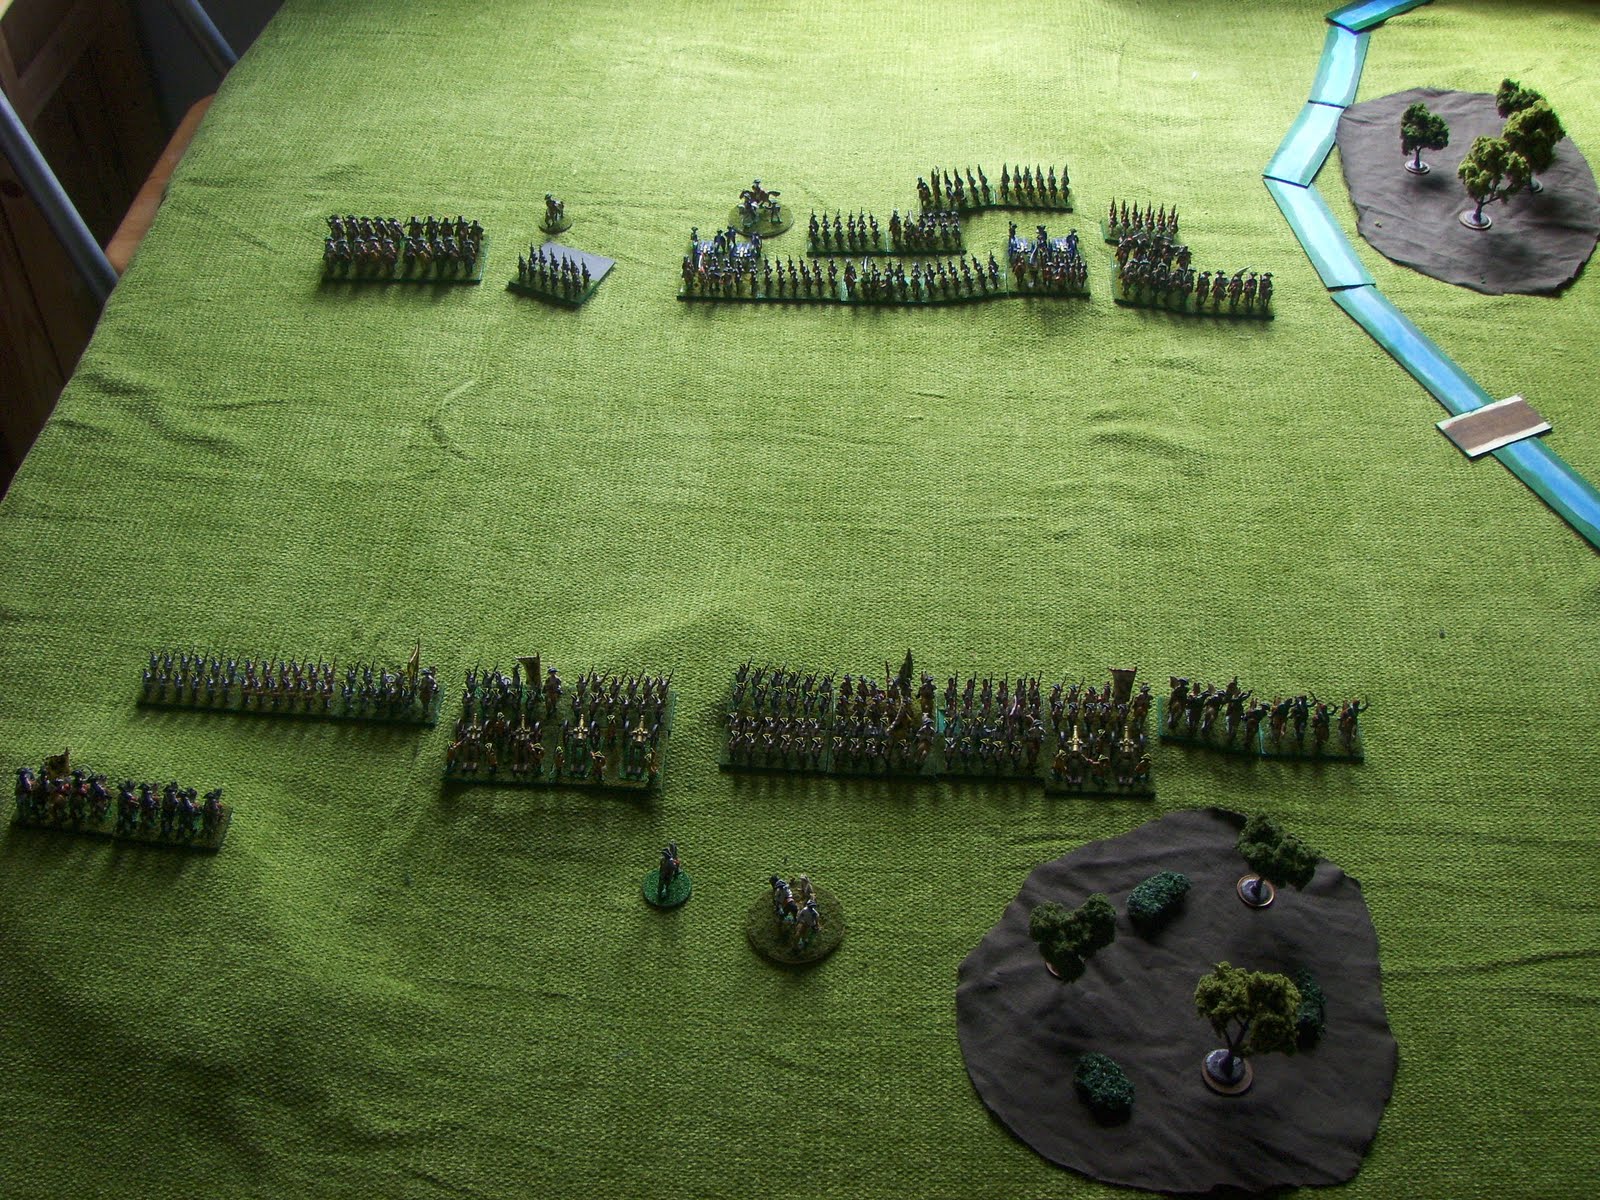 The white-coated Sarvanians enter the filed of battle from the bottom of the picture, while the blue wall of Strathians wait silently for them - both flanks anchored on a small village and a stream on each side of them. There's only one route for the Sarvanians to take - headlong!
 The Sarvanian infantry attacks in double-ranks, keeping its Grenadiers and lively Hungarian-style regiments to the fore. On the open flank, the Sarvanians move artillery up and a screen of infantry, thus bringing the village under bombardment and blocking the superior Strathian cavalry.
 Kapow! After enduring a hail of incoming cannon-balls, the Sarvanian line hits home. The bluecoat Strathians reel back, with some units cracking up under the strain and fleeing for the rear as the Hungarians press home and threaten to put their swords & bayonets to use.
 The fight goes on, but bogs down. Count Stresswitz keeps a steady hand on things and rallies waverers, plus sends reserves in as required to blunt the Sarvanian attack.

General Von Kreist, Reichskanzler of Sarvania, has had a pretty good day by his standards. His obligations to the League are fulfilled, and the strength of the Strathian military whittled down a fair degree - as are his own. True, some might say he just did the bare minimum and then retreated, or that his attack was beaten back, but what do they know? The Strathian position was a tough one, and the slippery Count still had his grenadiers in reserve - clearly no decision of decisive nature was going to be reached, and in the best traditions of 18th-Century Military Theory are clear: bst to withdraw and count on the damage done collectively adding up. Now, all eyes in the region turn northwards to the anticipated Strathian invasion of Meldenia...
[A quick word on forces in the campaign: The Strathian army is huge, and by points-standards it is as large as the other three allied armies added together. However, as the other three countries can rebuild every year in normal DBA-Campaign style, the Strathian Player can't. His large army will, in a protracted war, be ground down until it also reaches the same size as any other participant, when it will then recruit normally. If The Duke of Strathia fancies remaining the regional top-dog, he'll have to do it fast!]
Tuesday, August 16, 2011
The League of Strathia

What with all the talk of vast new campaigns, new army collections, etc. it's actually been some time since some games were published here! As I realised this with a start, I decided to get something quick and simple done and issued asap, rather than saving away and leaving huge gaps where nothing was really happening. So: here is my new 'quick' DBA-style campaign, between some local rivals.
Allow me to introduce four minor countries, huddled together in a minor enclave off the Baltic coast. Going clockwise, there is the Freistadt of Buvalia, a mercantile state sitting at the mouth of the River Mannow; there is Sarvania, the large and landlocked country to the southeast; next is the dominant local power, the Duchy of Strathia; last, the coastal and rugged Duchy of Meldenia.
This group of countries used to be under Strathia's control in the 'League of Strathia.' However, the greedy Duke Franz Von Halburg has taken a bit too much from them all, for a bit too long. The states have united, and declared war on Strathia to end the League. Can the Duke maintain Strathia's control? Will the rebelling alliance hold together long enough to secure victory? And if so, which of the three will emerge as the new dominant regional power?
Sunday, June 12, 2011
New Model Army?
Recently, while noodling and footling around with different imaginations for my planned big grand campaign, I found myself at a quiet moment painting-wise. As I have been posting on my other blog, I've recently finished up and squared away a large WW2 project. Now, with my spare evenings, I seem to be at somethting of a loss without as many projects. This got me thinking about something I swore not so long ago I simply wouldn't do: collecting another Seven Years' War army.
Uncertain if this was a good idea or not, I began to look into it and pondered what to get. I settled pretty rapidly on a Russian army, who (barring small exceptions) posed the other main enemy that Frederick the Great found Prussia tangling with on the battlefield. The general outlook is good: natty uniforms with a nice green-and-red scheme; stackloads of artillery; stubborn infantry who just never seem to quit; comically (on the games table, at least) inept commanders more interested in fighting with each other than an enemy; cavalry with hordes of light horse in the form of the Cossacks. In short, a force which would sit nicely alongside the Austrians and Prussians I already own and have enough of an individual character to make it hold it's own. Browsing and planning the Essex Miniatures' website (my supplier of choice for 15mm figs) has seen me work out a three-batch system which allows me to grow the army progressively over time up to the final planned size, which would mean it could compete with the two others.
All that I need to do now is convince myself I'm really up to painting hundreds of tricornes and coat-facings once again! (shudder...)
Friday, May 20, 2011
Down the Wargame 'Rabbit-Hole'
Good grief, but I didn't think a wargames campaign would take up so much time purely in the setup! I've surprised myself, to be honest, but wanted to at least check in to say progress is ongoing. I'm currently working with a massive hex map I've made, by printing and taping twelve A4 pages together to produce a massive folding map of a fictional area. Whether the map covers a fictional continent like Europe or some minor Baltic Enclave beneath the notice of history, I haven't yet decided (or much see the need to ever decide!)
I am currently detailing the countries as per Tony Bath's advice, which is strangely 'against the grain' as far as I'm concerned. Normally I'm all in favour of reducing detail in a campaign to make play smooth and easy, but this system of Tony Bath & Co. goes the very opposite way. Everything, down to the population of farmhouses and the national budget is detailed by following his advice! Contrary to my expectations, this actually helps with the detail, as I feel I 'own' the creation far more with this sort of detail at my fingertips. Quite a pleasant surprise, I must say. I shall post again soon, with some map info and the basics of how one of my countries works. Back to the Exchequer!
Friday, April 8, 2011
Campaign Plans
It's been quite a while since I was wargaming anything SYW-related, to be honest, but the itch has not gone away. I have resolved on a new project for my nations of Aschenbach and Luftberg, in order to re-launch the enthusiasm. I was campaigning over the small province of Muckenmire, but things have degenerated and slowed so much it seems pointless to become bogged down in it. Time to man up, accept it's halted, and park it for a while. Maybe in the future I can pick it up again (the advantages of detailed record-keeping!)
So, what now? I had toyed with the idea of a large campaign which took on board some of the lessons I had learned from the Muckenmire campaign. I liked the hexes & movement, but felt I had allowed too small an area and clogged it with fortresses - possibly realistic, but something of a struggle to campaign in for a game. I also had higher ambitions, as a flip through the old rulebook 'Warfare in the age of Reason' by Tod Kershner saw the campaign system catch my eye. For those who don't have this, it's basically a full SYW campaign map, with the whole of Europe shown, plus the American Colonies & Indian Subcontinent included.
I liked the notion of something big-scale, but there was one problem: I had Prussian and Austrian armies, but no others - and I had sworn a solemn oath to myself that after long months painting the pair of them, I was never again painting a large 18th-Century army! I abandoned the idea, but the potential still remained and I turned it over and over in my mind.
Finally, another two sources of information/inspiration arrived! On a whim, I got the 'Campaign Cartographer' software for myself to let me draw good-quality maps (after just one too many uninspiring hand-drawn black & white effort) plus I ordered a copy of the old-style classic 'Setting up a Wargames Campaign' by Tony Bath.

I am currently reading through this and sketching out ideas, but I think that I am generally clear on the plan I have: Aschenbach and Luftberg fighting each other through a large map littered with minor principalities and duchies (who, through the influence of their powerful neighbours, just happen to have extremely similar uniforms) plus some colonial footholds that the two superpowers can scrap over through land and sea! I'm still reading onwards, but I shall keep you updated on my progress so you can see how things develop.
Thursday, January 27, 2011
Battle at Grossenbasch
After a break over the xmas holidays, I thought I'd share some pics from a one-off fight I'd had. At random, I decided to just put each full army on a big table and fight out a stand-alone battle. Normally I have been recently doing this on the floor of the living room, but the knees don't take well to it! Instead I broadened out the dining room table by the simple method of putting down some sheets of MDF board to widen it from a small-ish rectangle into a large square area - and then I crammed every bit of scenery I had onto it, to make the terrain as challenging as possible.

After a brief setup, I was off! Each army advanced from it's setup area, rapidly gravitating towards the defensive positions around - of which there were many. Below is the Luftberg army in it's deployment zone, about to occupy a small hill to its front.

Below we have the Aschenbach army, which has the space for a more linear setup to the front, and guns packed on a hilltop behind.

The battle opened with the speedy Aschenbach advance in the centre, between the two areas of woodland. The centre offered only a narrow corridor for advance between these obstacles, so brigades of infantry went through one after the other. The object for Aschenbach became to have the two leading line infantry brigades swing left and right, leaving the enemy centre set up for the third brigade (made up of Grenadiers) to break through. The terrain is tough however - a stream on the left, a hill to the right, and an enemy-held village right in the centre!

Disaster looms! The Aschenbach infantry cause terrible casualties, but by trying to swing out and widen their front, they expose their flanks to enfilade fire as the Luftberg line bends back and becomes concave! The bluecoats flee, and the Luftberg line begins to advance. With Croats also sniping from the trees, could this be a total collapse for the Aschenbach army?

The grenadiers occupy the gap between the two woods, and crush the Luftberg advance with their steady volleys. The advancing tide is turned back, with the possibility of breaking the Aschenbach army part now rapidly fading - those grenadiers have sealed up the bottleneck like, erm, a cork in a bottleneck!

Sensing a loss of Luftberg strength, the grenadiers advance out to press on the enemy line. Luftberg units prove equal to the chance with their supporting batteries however, and the Grenadier advance is held - also thanks to some pretty aggressive counter-charging by the lively Hungarians!

And so, with the see-saw infantry battle over, the battle peters out in a standstill. The cavalry on each flank maintained a watchful hold on each other, waiting for one side or the other to gain an advantage in the centre before attacking. Sadly, that never came decisively for either side. The ground in the centre was certainly torn up, with an Aschenbach advance, then a Luftberg one, then a second Aschenbach attack, followed by yet another Luftberg counter-attack. As it turned out, the grenadiers were battered enough to pull back and hold the line long enough for all the batteries of artillery to be lined up in a protective screen. Each army had lost heavily, but neither had prevailed. I suppose the Aschenbach King can simply go home dissatisfied, but the Luftberg General will have a job writing to his Emperor and spinning this as a victory!

Wednesday, December 8, 2010
Hochkirch Re-fight Pics
Scandalous neglect! Sadly much real-life activity plus a total lack of opportunity has kept me from playing any games for a while, but I did recently manage to squeeze a half-sized battle onto my dining table, to re-fight the battle of Hochkirch. I won't give a large or detailed description, but shall post a few snaps I managed to take. The battle proved to be a real knockabout affair, and almost all the action took place in a 2ft x 2ft area on the Prussian flank, where the Austrian columns hit. Had I known, I would've simply written off a large portion of the field and scaled-up the area of interest, but there you go - you live and learn!

The full battlefield - Prussians deployed facing to the right, while the Austrians appear at the bottom of the table.

The Austrian attack columns

The Austrian attack columns - as seen from above

The Austrians attack the Prussian line around Hochkirch village.

The Prussians held them in a hot fight for a while, but the Austrians turned both flanks and steadily overwhelmed them by superior numbers.
Monday, September 27, 2010
Moving on to the next battle
Dear god, it's been nearly a full calendar month without any postings! Whatever is going on? Well, sadly the boring real world gets in the way now and then and weekends are fully-booked, which brings all opportunity for gaming to a crashing standstill. Shame, but there it is!
I have been toying with ideas however, primarily one about doing a historical re-fight. It dawned on me that my newly-completed armies could represent very good forces in a SYW-style refight. If I doubled the scale, a very big battle!
I checked online for some scenarios, and found a bunch of them available online for free via Sam Mustafa's excellent website for his rules 'Might & Reason' (championed here on my website on several past campaigns!) The link is:
After tabling the forces and relative sizes, I realised that the Battle of Hochkirch from 1758 was a plausible candidate for my dining room table, if I halved the unit size (i.e. represented each unit with a single base rather than the normal two.) I'm currently tinkering with scales and reduced areas, plus also trying to work out how to represent the landscape on the table (it appears that the battle map was basically a large sloping hill, with around seven different contoured heights given on the scenario map.) I was planning to make the terrain by putting some books under my grass-green throw-rug, but having 7 books mounded up at one end of the table and none at the other seems a touch ridiculous! Still, I'll contrive something roughly close enough to the historical map to let the refight go ahead - after all, with time so difficult to find, no little technical problem will cost me the chance for a tabletop scrap! So far, next weekend looks free, so I'm off to polish my breastplate and have my sabre sharpened up.
Thursday, August 19, 2010
The Battle of Berkhoek
I have cracked the use of Battlechronicler, so I can now supply explanatory maps and cut down on text - always far better to get the casual blog reader to follow a battle report, I find!
The situation starts with the Aschenbach army behind the small stream near the village of Berkhoek. Their right is on a wood, while their left is near a marsh. The cavalry is on the left, while there is a small field redoubt between the cavalry and infantry to protect the line further.


The Aschenbach line, seen from the redoubt.
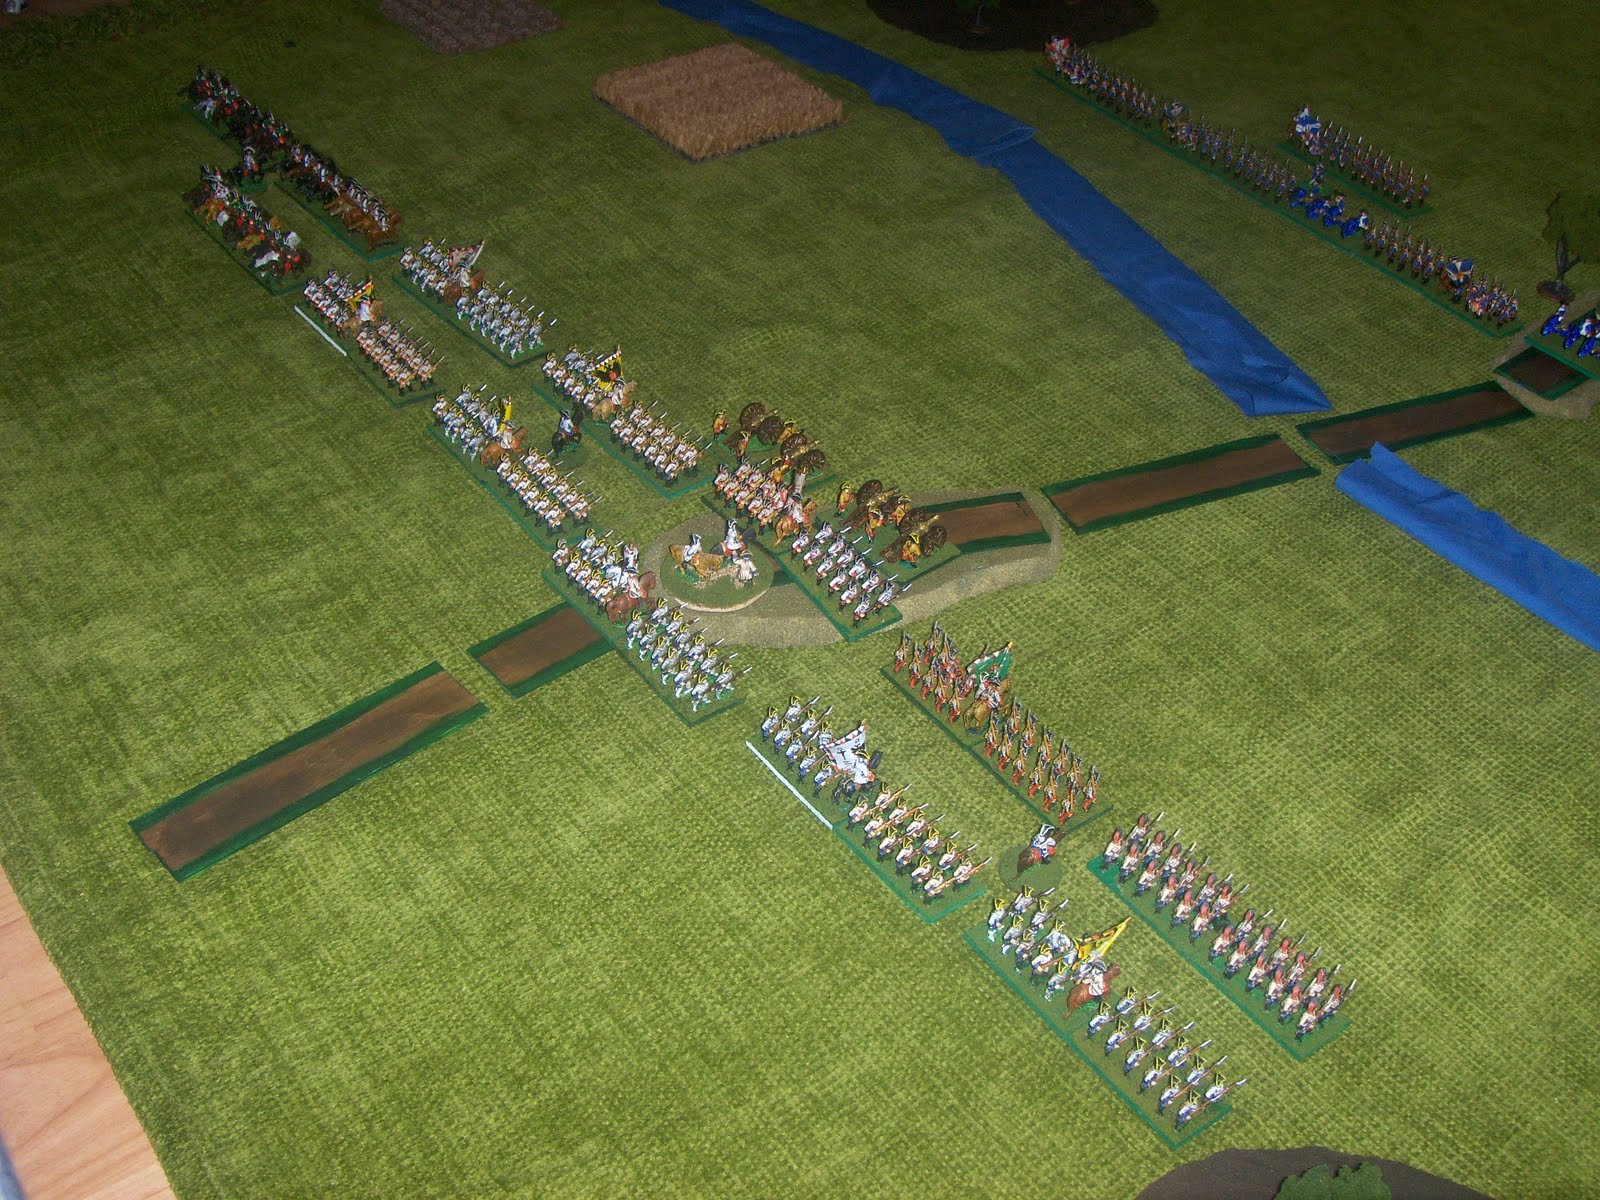
The full Luftberg army, deployed in classic linear style.

The advance got underway - Luftberg planned to pin the front and quickly deliver a flanking blow with the cavalry, which would roll up the enemy line. The Right-Wing cavalry advanced rapidly, splashing through the stream in front of the enemy horse and taking heavy fire from the redoubt.

The cavalry press on and attack the enemy dragoons, flanking them and forcing them back. Elsewhere the left-wing cavalry continue to languish and make slow progress, while the infantry lines trade long-range volleys. The grenadiers push heroically forward however, showing the aggressive spirit necessary!

The cavalry battle in progress.

Presumably inspired by the example, the Hungarians cross the stream too, after the Grenadiers - one battalion of which charges and captures the artillery guns next to the redoubt in heroic style, but sadly the redoubt's defenders make further advance impossible without exposing their flanks to deadly fire. Where are the cavalry - they're surely meant to protect against this sort of thing!

The infantry lines stutter forward towards each other, with battalions being repeatedly halted in disorder by the hot fire. Aschenbach is naturally doing better here, outshooting it's more poorly-drilled rivals.

Aschenbach's line is straining as the casualties mount, but the reserve Fusilier battalion from the depot in the rear finally arrives to help out. Likewise, a battalion of IR7 refuses the flank to keep the line together.

At last! The left-wing cavalry finally roll an excellent move and ford the stream, heading deep into the enemy rear. The right-wing cavalry are stalemated, and a second attempt by the grenadiers to charge some cannons is halted in a storm of grapeshot. The line is holding, but only just - and there's nothing left to stop this cavalry attack threatening to descend. Von Hartling decides to withdraw slowly, hopefully avoiding the enemy cavalry before it can get a successful orders roll. Disaster strikes however, when Von Hartling completely fails his own orders roll - his army is a sitting duck!

Nooo! The cavalry commander on the Luftberg left wing gets the second full-effect orders roll - two turns in a row now! This incredible streak of form sees his horsemen descend onto the backs of the hard-pressed bluecoats, who promptly shatter like glass.


The disaster is total - two battalions are scattered, while a third is surrounded along with the surviving gunners. Caught deep within the milling hordes of Luftberg troops, there's nothing for it but to send out a white flag and begin the genteel process of negotiating an honourable surrender. Von Hartling does however use the time for this wisely, snatching his remaining infantry clear of the wreckage, abandoning the redoubt and falling back behind his cavalry as a screen.

Gentlemen, another glorious victory to the Elector Von Luftberg - champagne!
Tuesday, August 17, 2010
Technical Problems
Apologies for the delay, everybody. The battle is fought, but I am intending to post photos & the report along with maps using the Battlechronicler software - worth googling as it's a free download for your wargame maps etc. to put on your blog. Only problem is that I'm still going through the 'teething troubles' stage, getting the hang of how to use it. The results should be along soon, hopefully, so please bear with me!
Friday, August 6, 2010
Up-and-coming Fight
Winter approaches, so both sides are largely clearing up the province by engaging in the time-consuming and static pursuits of siegecraft. Von Krumper is now camped outside Veldhuizburg, Von Zaub is away investing the large and isolated city of Oosterheide, and Von Hartling - well, it's not going so well. After entering the province and sweeping a few towns away from the enemy, the dire autumn weather forced a halt and consolidation, building a depot to let him move deeper into enemy territory. Upon completion, he crossed the river Konigveldt and approached the garrisoned town of Vincken for a siege. Sadly for him, there was a late-freeze in November that restored full-speed movement in the province before the serious winter snows set in. With the roads passable, no less a force than the Elector Von Luftberg's army itself (newly arrived in the province and looking for trouble) began approaching fast.
Keeping up the siege was impossible, and hasty withdrawal to the Konigveldt river the only option. However, Von Hartling wasn't about to give up without a fight. The road back to the river is one of 20 miles, but two-thirds of the way back the road is hemmed in - by woods and the river to the north-west, and swampland to the south-east. At this bottleneck, the outnumbered Aschenbach army can make a stand and hopefully bloody the noses of the Elector's men.

Forces are as follows below. The Aschenbach army has every advantage of terrain and position, but is heavily outnumbered: parity in artillery, but facing odds of two-to-one in Infantry and three-to-one in Cavalry.
Aschenbach - Von Hartling commanding
IR4 Von Hoffman Infantry Regiment
IR7 Von Dunckel Infantry Regiment
FR8 Von Grappel Fusilier Regiment (one battalion late-deploying)
DR1 Von Fleiger Dragoon Regiment
#2 Artillery battery
Rudimentary fieldworks
Luftberg - Von Luftberg commanding
Pilsen Grenadier Regiment
IR2 Doppler Infantry Regiment
IR5 Von Trapp Infantry Regiment
IR7 Von Stiegl Infantry Regiment
IR9 Bartok Hungarian Infantry Regiment
KR3 Klimt Kurassier Regiment
DR2 Krauss Dragoon Regiment
HR2 Schiele Hussar Regiment
#1 Artillery Battery
Siege Train (not on field)
Pontoons (not on field)
Monday, August 2, 2010
Painting: Completed!

It's done! In a post I sometimes never thought I'd type, here it is: I have completed my Seven Years' War armies! First conceived in 2008, and now - roughly one and two-thirds of a year later, they are now completely painted and based. I had thoroughly sickened myself of painting after an earlier burst that broke the back of them, and allowed me to play games with a few left over - I just couldn't face mopping up the remainder. Little bits were done here and there, slowly nibbling away at the pile, but that was all.
Then, yesterday morning, I suddenly had the impulse out of nowhere to just get my head down and finish it off. One lazy Sunday transformed into a frenzied paint-a-thon later, and it is over. The final Aschenbach units are complete, painted and based!
Doubtless when they make the film of this deranged painting project (it's all in my mind's eye, so why not?) I'll be on-screen looking all windswept and conflicted, trying to decide whether to go back for one last mission(painting session) before final retirement. I'll be living in some log cabin in the mountains, where I've no doubt sought refuge from the horrors of the war(gaming.) I'll tell my boss(conscience) that I'm through with it - I'm out, and have no more interest in coming back. He'll tell me that if I don't do it, nobody else will - and, just before he walks off to leave in his jet-powered helicopter (yes, he has one of those) he tosses a single, battered figure at my feet. I look down, and pick it up: a Prussian Musketeer, Advancing (Catalogue Number SYWP1 , Essex Miniatures.) Slowly clenching it in my fist, perhaps delivering a skyward shout to the uncaring gods, I know that once more I'm back in the game, damn them. Just when I thought I was out, they pull me back in... They pull me back in...
In retrospect, I probably need to go have a bit of a lie down! Ponder all the games to come, and all that! :-) Here's some eye-candy of the second army.

Cavalry above - Cuirassiers & Dragoons

Generals & Grenadiers

Fine regiments of Infantry, Grenadier mitre-caps shining in the foreground

Infantry in foreground, plus Fusiliers and Hussars behind

The Artillery

Meet Otto - the flag-bearer in IR7 (Von Dunckel) who enters my personal painting valhalla, as the very final figure based out of the approximately 719 painted and based to complete this project.
(Also, Thanks to all who ever read the blog or posted on it over the long struggles with kind words of encouragement - it made a big difference!)
Subscribe to:
Posts (Atom)